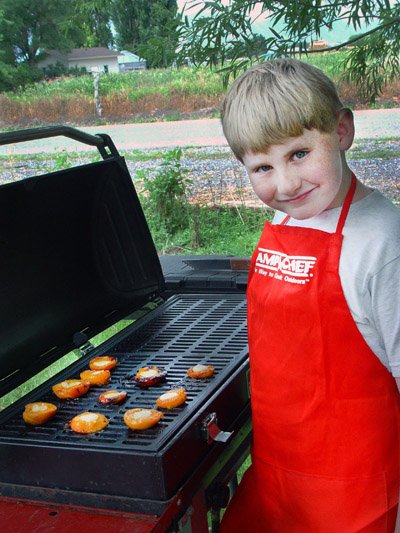
Ed and Gerry are mixing up something interesting for Dinner. Click Picture for their secret identities.
Tips
***To avoid 'onion eyes', peel the onion under cold water or refrigerate or freeze it before chopping.
Tips from the International Dutch Oven Society
SEASONING, CARE AND USE OF THE DUTCH OVEN
from the IDOS Website
When you purchase a new Dutch oven, or any cast iron product, you must first remove the protective coating. It is placed there after manufacture to protect from rust. The best way to remove this is with hot soapy water and a wire scrubber.
I prefer to scrub it two or three times, rinsing after each time to feel if it is still there. After the cleaning, rinse with hot water to clean off the soap.
Next, it needs to be dried till there is no moisture left on the oven. The easiest way dry a Dutch oven is to put it in a warm (160ish) kitchen oven for 30 minutes or so, then let it cool enough to handle it.
Now you are ready to begin the seasoning process. I prefer lard or white shortening and not oil. Oil tends to make it very sticky afterwards. Using a paper towel, apply the shortening or lard to the inside and outside of the oven until all is coated. Put some extra inside the oven.
Do the same with the lid.
Put both in a 425 degree kitchen oven and bake for one hour. Then, using tongs and a paper towel, swish the excess seasoning inside the oven around coating the entire area and lid.
When the time is up, remove from the oven and swish the excess seasoning on all the inside to coat and let sit in the oven until cool. Using a paper towel, wipe the inside of the oven to coat again all inside surface and then wipe all the excess out to just leave a thin coating on the oven.
Now you are ready to start cooking.
It is best to begin with foods which require a lot of oil such as deep fried foods or bread as they tend to continue to coat the oven. After each use wash only in very hot water to clean. If you cooked bread in it, wipe a light coating of seasoning on and you are ready to go again. It does not require washing out. If you cooked something which stuck to the oven, put oven back on the heat source and heat until it boils and use a plastic spoon to remove the stuck food.
Dump out the water and rinse with hot water at least twice, wipe out with a paper towel and then apply a light coat of seasoning to the oven and you are ready to cook again. If you are going to store your oven, place a paper towel inside the oven to help absorb any moisture. Almost any seasoning will become rancid if you leave it for a long time. If you are going to store your oven or not use it for a long time, simply store it without the lid and apply a light coat of mineral oil and it will not become rancid. Store in a location where it is protected from moisture and dust.
If the oven gets rusty, you can clean it up by soaking the rusty area in Coca Cola for an hour. Then scrub with wire scrubber only where it is rusty. Then, rinse it out and re-season that part of the oven again by applying a coat of seasoning and heat to 425 degrees for 30 minutes. You are now ready to begin cooking with it again.
There are times when, during the process of seasoning it, too much seasoning is applied and a build up occurs and, after a while, it will begin to flake off.
The only remedy here is to clean off the flaking material and start over again or just continue to cook in it as it is.
A well seasoned Dutch oven is a prized possession and will last a lifetime and can be passed on to your family as an heirloom which will function as long as it is taken care of properly. Enjoy every minute of your time while cooking in these wonderful ovens. They provide so much wonderful food and wonderful times when they are properly cared for. This requires a minimal amount of care after each use.
The biggest sin in using the Dutch oven is to use it and then not clean it for days or even weeks. There are actually people who do that, requiring the oven to be seasoned again.
One more note:
Be careful with high acidic foods as they will eat away at the seasoning on the oven.
Featured Recipes
Ultimate Turkey awaits for Thanksgiving

Taking your Thanksgiving turkey to the next level is now possible with a new cast iron roaster, built similar to the pioneer Dutch ovens, but with a new technological twist, improving cooking times and flavor.
Helping your bird stay juicy and delicious, Camp Chef has recently launched a new line of Turkey Roaster Ovens, allowing homeowners to cook their centerpiece outside and provide new space in the oven for pies and other delicious morsels.
The Ultimate Turkey Roaster offers convection style cooking, which cooks the bird both inside and outside. The patented vent cone in the oven's center improves circulation and allows hot air from the burner to enter and flow around the inside of the roaster; cooking the food more quickly and evenly than traditional roasters. The center cone also allows the food to cook from the middle outward, also decreasing cook times and increasing food safety. With it's unique design, culinary artists may enhance the bird's flavor by smoking it while it cooks outdoors. The deep dish lid gives plenty of head room for turkeys and roasts while doubling as a deep pot for other applications, including boiling vegetables, deep frying, or making stews.
Because the roaster incorporates convection style cooking, it needs little to no oil or lard to perfectly roast and cook any meal. Although this cooker is fast and can cook a twelve pound turkey in one hour, many users prefer cook the bird slow, which aids in tenderizing the meat. Provided is a recipe that will make any mouth water. For more information about the Ultimate Turkey Roaster or other recipes check out the Camp Chef website at http://www.campchef.com/
or call 1.800.650.CHEF (2433).
Ultimate Roasted Turkey
One 10-18 lbs. thawed turkey (remove giblets)
One DFT-6 thermometer (included)
Injection marinade (for added flavor)
Camp Chef all purpose burner
Oven mitts or gloves
DIRECTIONS:
Trim away neck fat and remove all of the neck by making a one-inch cut down each side of the neck. Pull neck away from the body cavity and remove. This leaves a nice hole for the heat to get up to the lid.
Completely thaw turkey. On larger birds, cut away tail and make a two-inch cut up the lower back between the thighs. Pull this area apart. This allows the bird to sit down over the cone more readily.
Inject the bird with your favorite marinade. Try adding 1/4 cup of lemon juice to your marinade mix. Spray non-stick pan spray around the inside of the Dutch oven and on cone. Place the cavity of the bird down over the cone with the neck area up. Insert thermometer into the thickest breast area of the bird. Do not push it all the way to the bone. Mid-way is fine. Avoid gristle.
Thermometer dial must be positioned on the outside of the pot with the stem resting through the notch on the lip of the Dutch oven base. Sprinkle red based seasoning on the bird to enhance roasting.
When smoking meat in the roasting oven use 1/2 cup of apple, mesquite, hickory, or cherry wood chips. Heat roaster until chips smoke readily before adding food. Leave lid slightly cracked for first 15 minutes to allow smoke to circulate.
Cover with lid. Turn lid until arrow on lid lines up with thermometer. Put the all-purpose Camp Chef burner between medium and low heat. After approx. 30 minutes, add 1/2 cup of liquid to prevent burning. Cook until the thermometer gauge reads 170 degrees F for medium meat. (165 degrees for done and 180 degrees for well done.)
For best results cook on low heat 8 minutes/lb., although medium heat 5 minutes/lb. also cooks well.
As always, use caution when handling hot cookware. Always use two hands when handling either the lid or base of the Ultimate Roasting Oven. Handle roaster by handles on sides of unit.
Let turkey stand for 15 minutes before removing and serving. To remove bird, put two forks in opposite sides of the breast meat and rotate bird on cone while lifting out.
When you remove the food from the roasting oven, while it is still warm, add a couple of cups of water and let it soak while you eat. Afterwards, use a plastic scraper or scouring pad to remove any drippings.
Camp Chef Cookbook Available
Warm weather often means outdoor picnics, camping excursions, and barbeques. To help make your menu planning more enjoyable and your meals more delicious, Camp Chef, the manufacturers of several fine outdoor cookers, griddles, and grills, has recently released a new outdoor cookbook for all outdoor chefs, titled Camp Chef Outdoor Cookbook-- Your Complete Guide to Outdoor Cooking.
With over 100 recipes provided, author, Marla Rawlings, offers tips, suggestions, and hints to improve your Dutch Oven cooking, barbeques, and griddle frying. Many of the recipes are easy to follow, with several customized for the popular line of Camp Chef outdoor cookers.
Recipes range from breads and breakfasts to soups, main dishes, and desserts. Additional sections cover sauces, canning, and brewing. Spiral bound to lie flat while cooking, you won't lose your place while preparing a meal.
Listed at $15.75, this text is available at bookstores, sporting goods stores, and all locations where Camp Chef products are sold.
Featured Recipes
Garlic Lime Chicken
6 Chicken Breasts
3 Tbsp Olive Oil
2 Cloves Minced Garlic
2 Tbsp Dried Onion
3 Tbsp bottled Sweetened Lime Juice
½ tsp Cilantro Diced Fine
Combine marinade ingredients and beat well. Marinate chicken overnight or at least 4 hours. Cook on Camp Grill Box at medium heat. Season with salt and pepper and baste with marinade while cooking.
Fish and Chips
1 lb Fish of your choice cut into flat, long strips
½ cup Flour
½ tsp Salt
½ cup Milk
1 egg
Dash Hot Sauce
3-4 Potatoes Cut French Fry Style
Salt
Oil for Frying
Tarter Sauce
Mix flour, egg, milk, ½ tsp salt and dash of hot sauce in medium size bow. In 12 inch Dutch oven heat 1 ½ to 2 inches of oil on medium high heat. Add french fries and cook until golden brown. Remove with slotted spoon, drain on paper towel and sprinkle with salt. Keep hot until fish is done. Drop fish in batter mixture and fry until fish flakes easily, about 3-5 minutes. Drain on paper towel and serve with fries and tarter sauce.
Onion Rings
(Can be used for corn dogs, fried vegetables like mushrooms, zucchini, etc. and is also great for fried cheese sticks.) This is a restaurant style recipe. To make easier on a camp-out, mix the dry ingredients at home.
1 Cup Cornmeal
1 Cup Flour
2 tsp Baking Powder
1 Tbsp Prepared Mustard
1 Tbsp Chili Powder
2 Eggs
1 1/4 Cup Milk
1 ½ tsp Salt
1 Tbsp Sugar
3 Large Onions sliced thick (or whatever you wish to coat)
Oil for deep Frying
Mix dry ingredients together then add milk and eggs. Mix until no longer lumpy. Heat oil on medium to high flame in 10 to 12 inch Dutch Oven. Dip onion slices to coat then drop one at a time into hot oil. When onion ring surfaces, add another one to the oven but do not over crowd and turn when browned. These cook fast, so watch them closely. Remove with a slotted spoon and drain on a paper towel.
|